This section allows you to restrict access and permissions to various sections of the app.
- - When creating/editing a user, you will choose which role the user will use.
- - You can use the system default roles, or create your own custom roles.
- - Because a client user could have admin access, you can specify which roles a client can see and use.
Next will will look at the following sections
i. Creating client roles
ii. Assigning roles to clients
iii. Assigning roles to client users
i. Creating client roles
By default you will see 3 locked roles that have been generated by the system, these cannot be deleted or edited.
If these default roles do not suit your needs, you can create a CUSTOM ROLE.
To create a CUSTOM ROLE:
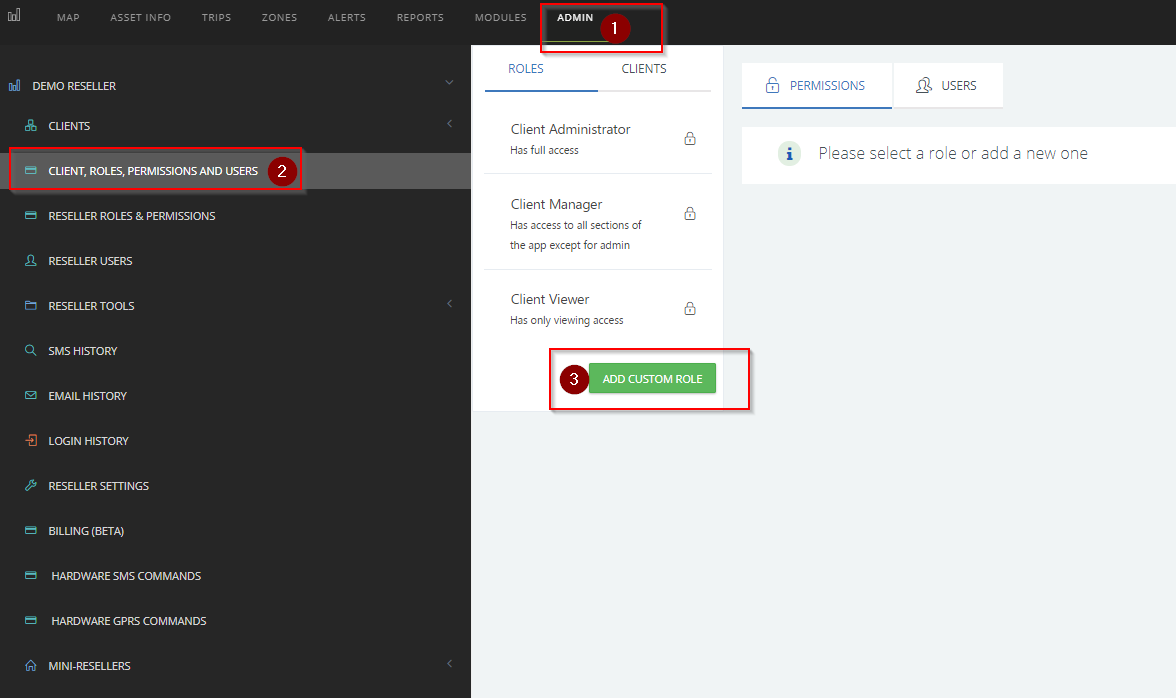
Login to your portal as a reseller.
Navigate to ADMIN tab and click on CLIENT ROLES & PERMISSIONS
Click on ADD CUSTOM ROLE
Give the role a name and a description as shown below
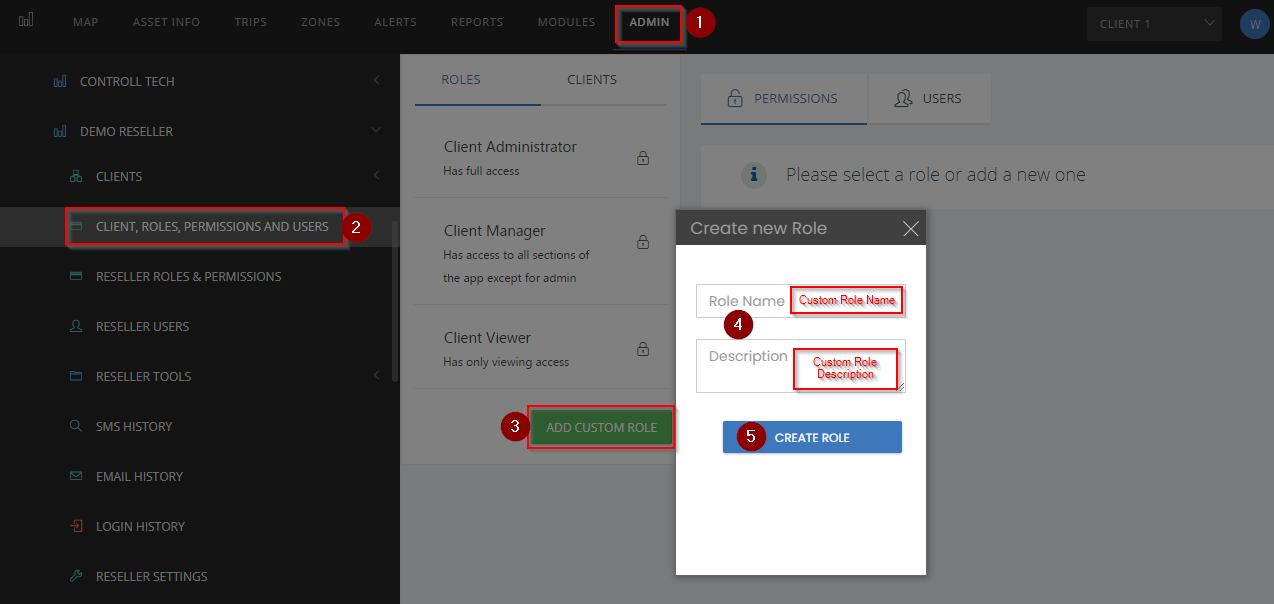
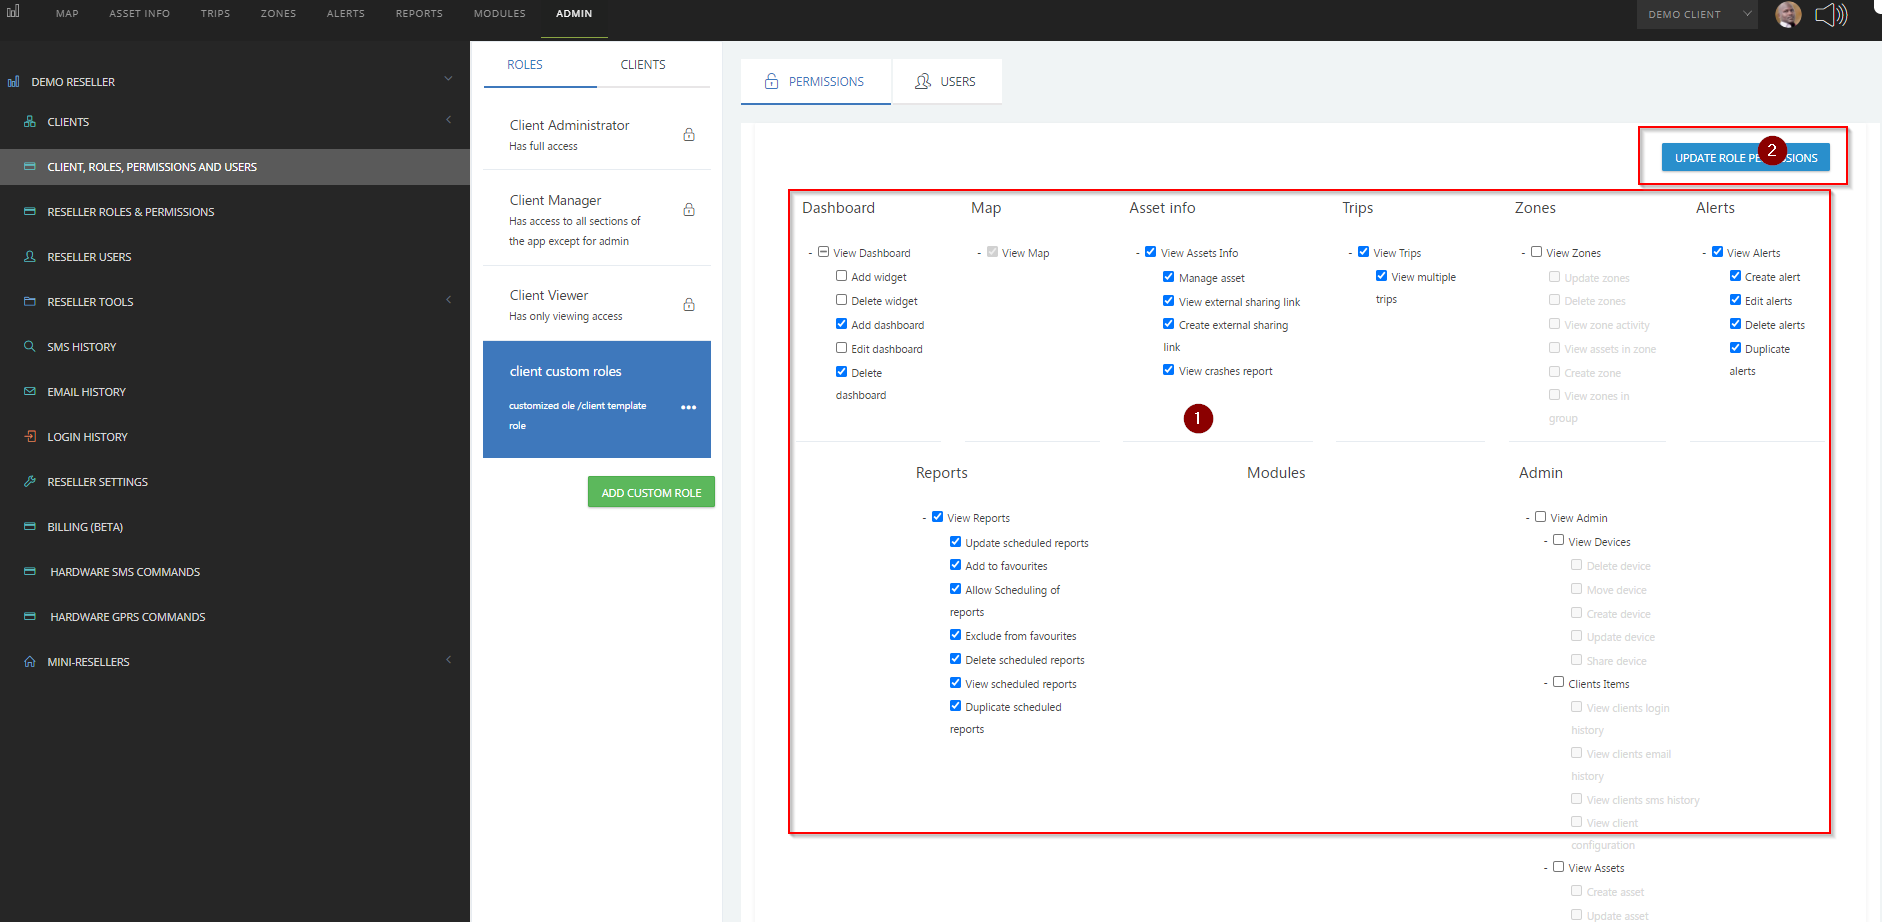
After clicking the CREATE ROLE button ,you will be presented with the PERMISSIONS for this role.
When you have finished choosing the required permissions, click the UPDATE ROLE PERMISSIONS button in top right corner.
After your new role is created, you must enable this role for each client as shown in step 2
ii. Assigning roles to clients
To assign this role to a client, click on CLIENT ROLES, PERMISSIONS AND USERS then go to CLIENTS tab
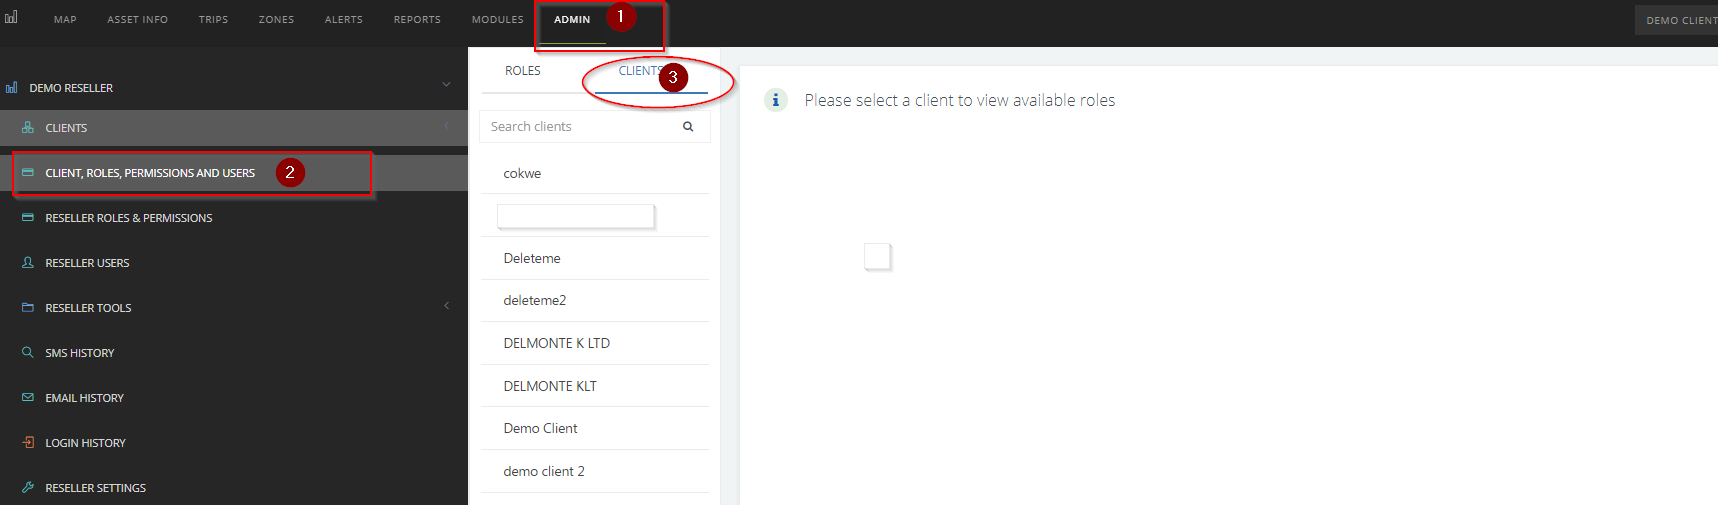
Select the client, and enable the new role you just added
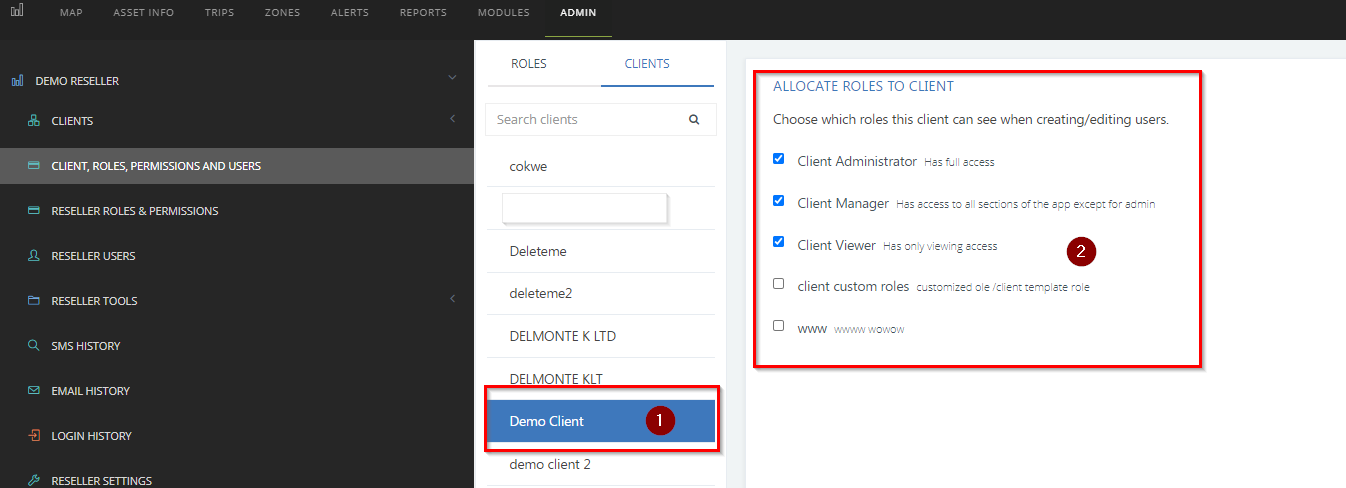
Now the role is visible for this client.
Any new/existing user can now be assigned to this new role you have enabled.
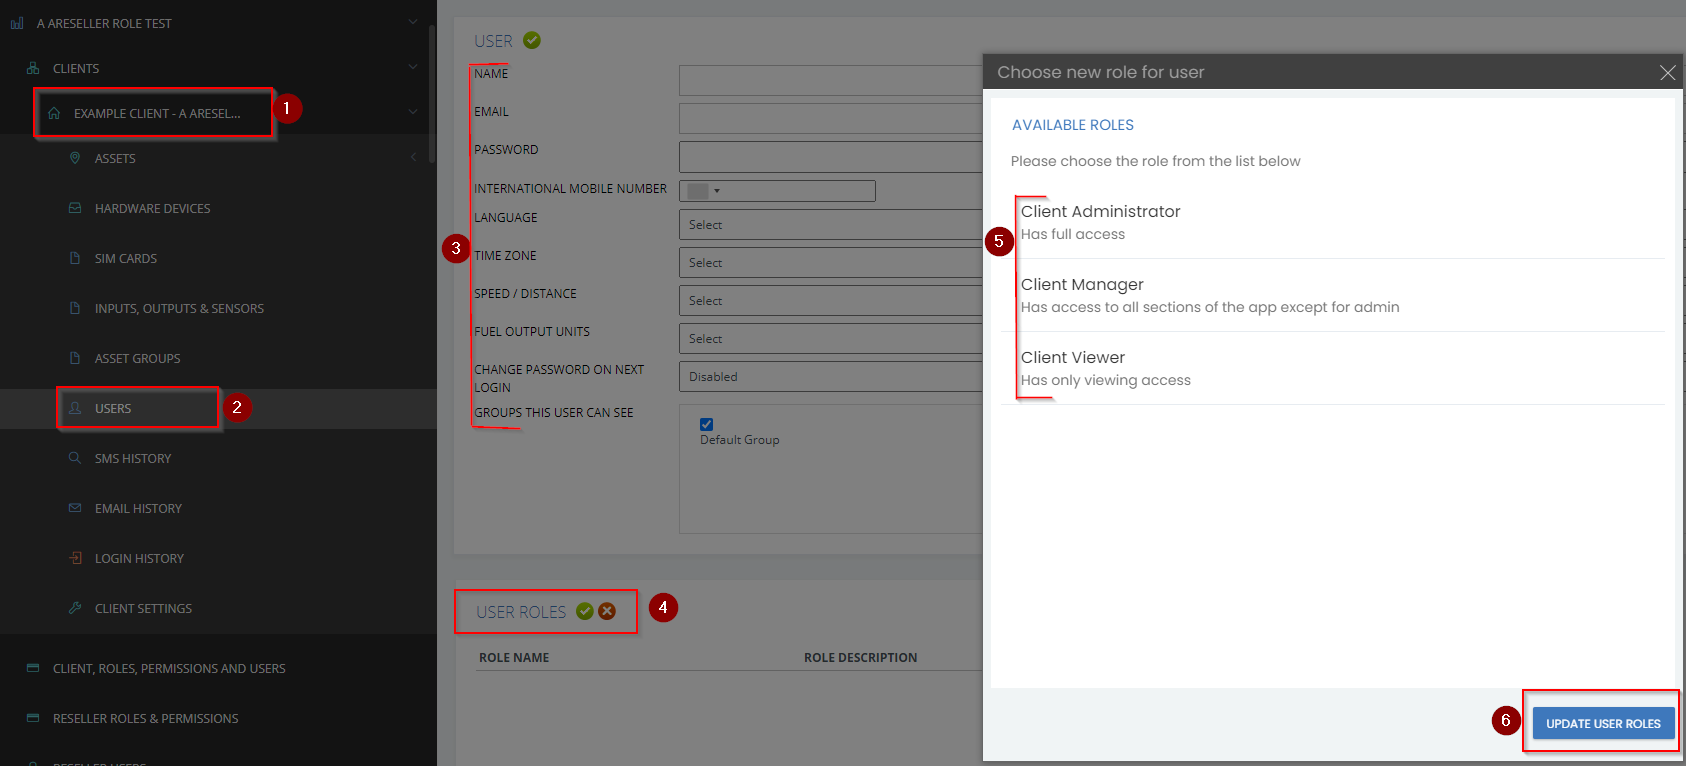
iii. Assigning role to a client user
If you are editing an existing user, you can either do this in the CLIENT USERS section or in the CLIENT ROLES, PERMISSIONS AND USERS section.
If you are creating a new user, you must choose the role as shown below:
a. Goto Admin/ Choose Client/ select USERS/ Create new user / choose the role (as shown below)
For existing users, you can also do this by selecting the USERS tab on the roles section as shown below, click MOVE USER TO ANOTHER ROLE
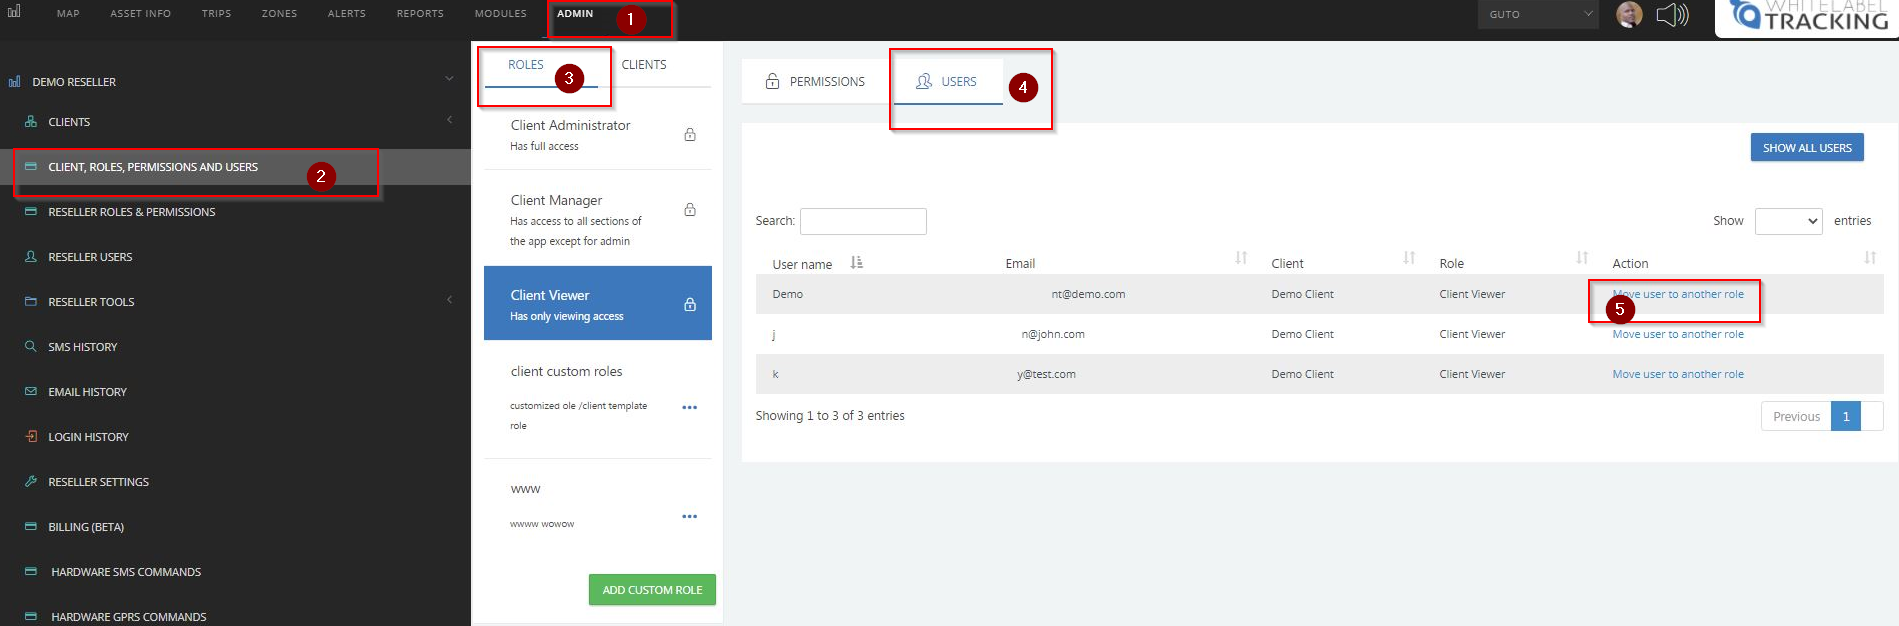
select the desired role then click 'update user roles' the click ''update roles''

Your new role is now properly configured